
Welcome to the ultimate guide on mastering Flutter, Google’s revolutionary UI framework. In this comprehensive journey, we’ll unravel the intricacies of Flutter app development, from installation to creating polished, cross-platform applications.
Understanding Flutter
What is Flutter?
Flutter stands out as an open-source UI toolkit by Google, designed for crafting natively compiled applications across mobile, web, and desktop platforms. Its unique architecture and features make it a go-to choice for developers aiming to streamline their development process.
Flutter’s Advantages
Cross-Platform Development:
Flutter enables developers to create high-quality native interfaces for both Android and iOS platforms from a single codebase. This cross-platform capability eliminates the need for separate development teams and ensures consistency across different devices, reducing time and effort in the development lifecycle.
Expressive UI:
With its rich set of customizable widgets, Flutter empowers developers to create visually appealing and highly interactive user interfaces. The framework’s flexible design allows for the implementation of complex UIs that mimic the native look and feel of each platform, providing users with a seamless and engaging experience.
Hot Reload:
One of Flutter’s standout features is the “Hot Reload” functionality, which allows developers to instantly view changes made to the code without restarting the entire application. This rapid development cycle significantly accelerates the debugging and testing process, resulting in increased productivity and faster time-to-market.
High Performance:
Flutter’s architecture is designed to deliver excellent performance by compiling code directly to native ARM code. This eliminates the need for a JavaScript bridge, leading to faster execution and reduced app startup times. Flutter-powered apps are known for their smooth animations and responsive user interfaces.
Rich Ecosystem:
Flutter boasts a thriving ecosystem of packages and plugins, providing developers with a wide array of pre-built solutions for common functionalities. This not only accelerates development but also ensures that developers have access to a supportive community, contributing to the framework’s continuous improvement.
Single Codebase, Dual Benefits:
Flutter’s single codebase approach not only simplifies development but also streamlines maintenance. Updates and changes made to the code are automatically reflected on both Android and iOS platforms, reducing the likelihood of inconsistencies and making it easier for developers to manage projects efficiently.
Open-Source Community:
Flutter is an open-source framework, fostering collaboration and knowledge-sharing within the developer community. The community-driven nature of Flutter ensures that developers have access to a wealth of resources, tutorials, and support, making it easier for both beginners and experienced developers to leverage the framework’s capabilities.
Adaptable for Different Platforms:
Beyond mobile platforms, Flutter can be extended to build applications for other platforms, including web and desktop. This adaptability makes Flutter a versatile choice for developers looking to create applications that transcend traditional boundaries.
Getting Started with Flutter App Development
Installation and Setup
Step 1: System Requirements Check
Before installing Flutter, ensure that your development machine meets the system requirements. Flutter supports Windows, macOS, and Linux. Make sure you have the necessary prerequisites, including Git for version control.
Step 2: Downloading Flutter
Navigate to the official Flutter website: Flutter SDK.
Choose your operating system (Windows, macOS, or Linux) and download the Flutter SDK.
Step 3: Extracting the Flutter Archive
Locate the downloaded Flutter archive and extract it to a directory of your choice.

Step 4: Adding Flutter to the System Path
Open your shell configuration file (e.g., .bashrc or .zshrc).
Add the following line to the file to include the Flutter binary in your system’s PATH.

Save and close the file.
Step 5: Verifying the Installation
Open a new terminal window and run:

This command should display the installed Flutter version.
Run:

Address any issues reported by the doctor, ensuring that all required dependencies are installed.
Step 6: Installing Flutter Plugins for IDE
Choose your preferred integrated development environment (IDE) for Flutter, such as Visual Studio Code or IntelliJ IDEA. Install the Flutter and Dart plugins to enhance your development experience.
Step 7: Setting Up an Emulator or Physical Device
To run your Flutter app, you need to set up an emulator or connect a physical device. Follow the documentation for your chosen platform to configure and launch an emulator or connect your device.
Creating Your First Flutter App
Step 1: Creating a New Flutter Project
Open a terminal window and navigate to the directory where you want to create your project.
Run the following command to create a new Flutter project:

Replace “my_first_app” with your desired project name.
Step 3: Exploring the Project Structure
Open your newly created project in your preferred IDE (e.g., Visual Studio Code or IntelliJ IDEA).
Take a moment to explore the project structure. Key directories include:
- lib: Contains the Dart code for your app.
- assets: For storing asset files like images and fonts.
- test: For writing tests for your app.
- android and ios: Platform-specific code for Android and iOS.
Step 4: Understanding the Dart Code
Open the lib/main.dart file. This is the entry point for your app.
Review the default code, which includes a main() function and a MyApp class.
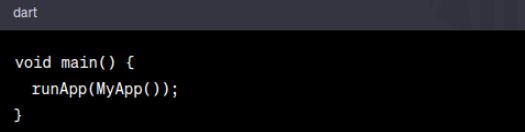
runApp() initializes the Flutter app with your MyApp widget.
Step 5: Creating Your First Widget
Replace the content of lib/main.dart with the following code:
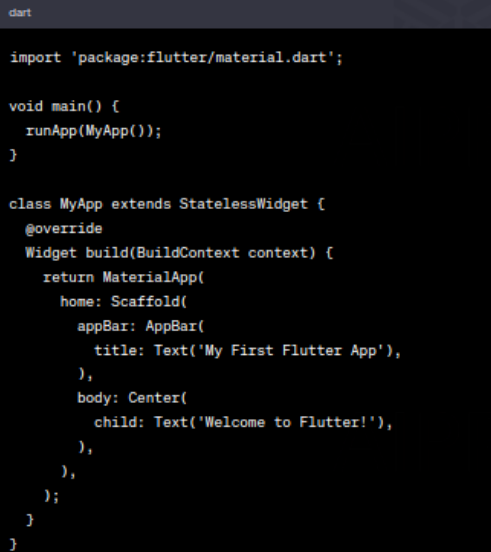
This code creates a simple app with an app bar and a centered text widget.
Step 6: Running Your App
Ensure you have an emulator running or a physical device connected.
In the terminal, navigate to your project directory and run:

This command compiles and runs your app.
Step 7: Making Changes and Hot Reload
Make changes to the text or any other part of your code.
Save the file, and observe the changes in real-time with Flutter’s hot reload feature.
Congratulations! You’ve successfully created and run your first Flutter app. This hands-on guide is just the beginning of your Flutter journey.
Flutter Widgets Demystified
Step 1: Understanding the Widget Hierarchy
- Widgets Everywhere:
In Flutter, everything is a widget. From structural elements like Container and Row to interactive components like Button and TextField, each part of your app is represented by a widget.
- Widget Tree:
Widgets are arranged in a hierarchical tree structure. The build method of each widget returns a new widget, allowing you to compose complex UIs by nesting widgets within each other.
Step 2: Exploring Common Widget Types
StatelessWidget:
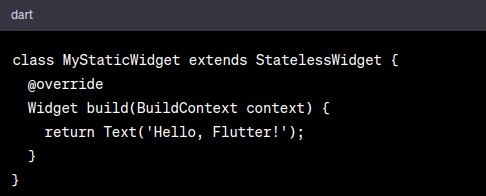
- Ideal for static content that doesn’t change over time.
- Utilized for UI elements without user interaction.
StatefulWidget:
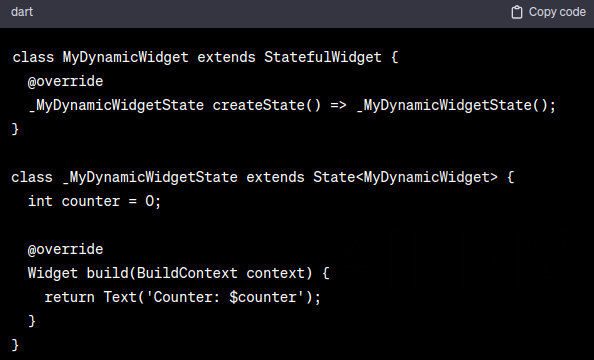
- Used for dynamic content that can change over time.
- Includes a mutable state that triggers UI updates.
Step 3: Layout Widgets for Structure
Container:
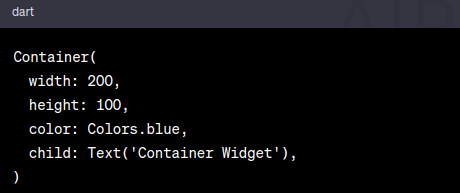
- A box model that can contain other widgets.
- Defines dimensions, padding, margin, and decoration.
Row and Column:
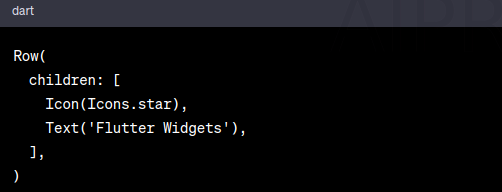
- Organize widgets horizontally (Row) or vertically (Column).
- Easily create responsive layouts.
Step 4: Interactive Widgets for User Engagement
GestureDetector:
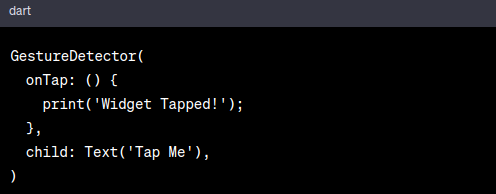
- Detects user gestures like taps, swipes, and long presses.
- Wraps around other widgets to add interactivity.
TextField:

- Allows user input.
- Provides options for customization and validation.
Step 5: Advanced Widgets for Navigation and State Management
Navigator:
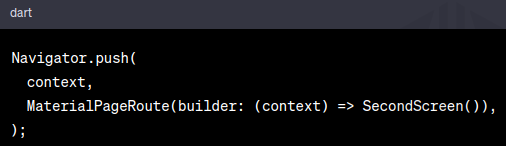
- Manages the navigation stack.
- Enables screen transitions.
Provider (State Management):

- Manages the app’s state efficiently.
- Avoids prop drilling by providing a centralized state.
In-Depth Development Strategies
State Management in Flutter
Grasp the concepts of stateless and stateful widgets. Learn how to manage the state effectively, ensuring your app responds dynamically to user interactions.
Advanced Widget Customization
Take your UI design skills up a notch by delving into advanced widget customization. Create visually stunning interfaces that captivate users.
Navigation and Routing
Navigate through your app effortlessly with Flutter’s navigation and routing system. Understand how to structure your app and create smooth transitions between screens.
The Future of Flutter App Development
Flutter’s journey is a perpetual evolution. Expect a continuous influx of features, improved performance, and a thriving community. Flutter is not just a framework; it’s a commitment to staying at the forefront of app development, ensuring that your creations are always on the cutting edge.
Flutter in Web Development
Flutter’s horizons extend beyond mobile app development. With the advent of Flutter for Web, you can seamlessly transition your Flutter skills into the realm of web development. Imagine crafting web applications with the same elegance and efficiency as mobile apps – Flutter makes it possible, creating a unified development experience across diverse platforms.
Integration with Firebase
Take your app to the next level by integrating it with Firebase. Flutter seamlessly connects with Firebase services, offering a plethora of functionalities such as authentication, real-time databases, and cloud storage. Elevate your app’s capabilities with the power of Firebase integration.
Growing Ecosystem
Flutter’s ecosystem is a vibrant marketplace of plugins, packages, and tools. Leverage this ecosystem to enhance your app’s functionality without reinventing the wheel. It’s a collaborative playground where developers share solutions, fostering a community-driven approach to app development.
Frequently Asked Questions (FAQs)
Q1: Is Flutter suitable for beginners?
Absolutely! Flutter’s simplicity makes it accessible for beginners, offering a gentle learning curve. Yet, it provides depth for advanced developers, making it a versatile choice.
Q2: Can I use Flutter for existing projects?
Yes, Flutter allows you to integrate Flutter modules into existing projects gradually. This flexibility enables you to leverage Flutter’s capabilities without overhauling your entire codebase.
Q3: Is Flutter only for mobile apps?
No, Flutter’s versatility extends beyond mobile app development. With Flutter for Web, you can seamlessly transition your skills to web and desktop applications, creating a unified development experience.
Q4: How does Flutter handle platform-specific features?
Flutter provides platform channels, facilitating the seamless integration of native features. This allows developers to leverage platform-specific functionalities while maintaining a unified codebase.
Q5: Does Flutter support state management?
Yes, Flutter offers various state management solutions, such as Provider and Riverpod. These tools help manage the state of your app efficiently, ensuring a smooth user experience.
Q6: What’s the community like?
Flutter boasts a vibrant and supportive community. Whether you’re a beginner seeking guidance or an experienced developer looking to collaborate, the Flutter community is a valuable resource ready to assist with any queries.
Congratulations! You’ve navigated through the essential aspects of Flutter app development. Armed with knowledge on its advantages, installation, widget usage, and advanced strategies, you’re well-equipped to embark on your Flutter journey. This comprehensive guide serves as your compass, leading you from a novice to a proficient Flutter developer. Happy coding!